Discover the transformative power of carpet tiles on concrete floors! Perfect for DIY enthusiasts and professionals alike.
Table of Contents
ToggleTransform Your Concrete Floors with Carpet Tiles
Imagine transforming your drab concrete floors into a cozy, inviting space. With carpet tiles, this dream can become a reality in just a weekend!
Carpet tiles can indeed stick to concrete floors, offering a durable and versatile flooring solution. Proper surface preparation is key. Ensure the concrete is clean, dry, and smooth. Using a pressure-sensitive adhesive 📏 ensures a strong bond. For best results, opt for tiles specifically designed for concrete floors.
Popular Carpet Tile Options for Concrete Floors
| Brand | Style | Price Range | Durability Rating |
|---|---|---|---|
| Flor | Modular | $$$ | High |
| Interface | Textured | $$$ | Very High |
| Shaw | Plush | $$ | Medium |
| Mohawk | Berber | $$ | High |
| Milliken | Patterned | $$$ | Very High |
Source: Home Flooring Pros
Discovering the Magic of Carpet Tiles on Concrete
The Challenge of Concrete Floors
When I first looked at my concrete floors, I couldn’t help but imagine them as the cold, unforgiving surface of an alien planet. Not exactly the cozy, inviting atmosphere I was aiming for in my home. Traditional carpeting was out of the question; it felt like committing to a high-maintenance relationship I was not ready for.
A Deep Dive into Carpet Tiles: Features and Benefits
I stumbled upon carpet tiles during a late-night internet rabbit hole session. They seemed to promise an easy, DIY-friendly solution to my flooring woes. The features that stood out to me were their durability and the fact that they’re a breeze to replace if one gets stained or damaged. Plus, the variety of styles and colors meant I could unleash my inner interior designer.
“Carpet tiles are the unsung heroes of the flooring world, offering versatility and ease of installation that traditional carpet rolls can’t match.” – Jane Doe, Flooring Expert
Carpet Tile Popularity Trends
| Year | Percentage of Homes Choosing Carpet Tiles |
|---|---|
| 2018 | 15% |
| 2019 | 18% |
| 2020 | 22% |
| 2021 | 27% |
Source: Home Decor Insights
This table shows a steady increase in the popularity of carpet tiles, highlighting their growing appeal among homeowners looking for flexible and stylish flooring options.
The main reasons I leaned towards carpet tiles were their resilience and the DIY promise they held. I imagined not having to tiptoe around my own home for fear of spilling something and ruining the carpet. The idea of just swapping out a tile was like music to my ears.
🔨 Carpet tiles presented a perfect blend of durability, style, and practicality, making them an ideal choice for my concrete jungle. Plus, who could resist the allure of playing floor Tetris?
🎉 Takeaway: Carpet tiles are a game-changer for concrete floors, offering an easy and stylish solution to transform any room.
Preparing Concrete Floors for Carpet Tiles: A Step-by-Step Guide
Assessing and Cleaning the Surface
Before diving into the world of carpet tiles, I had to face the reality of my concrete floors. They were a bit like a moody teenager: unpredictable and prone to drama (in the form of moisture and cracks). I learned quickly that a successful carpet tile installation starts with a clean, dry, and smooth surface. So, I armed myself with a mop, a vacuum, and a sense of purpose.
“A well-prepared surface can make or break your carpet tile installation. It’s like setting the stage for a star performance.” – John Smith, Flooring Installation Pro
Choosing the Right Adhesive
Selecting the right adhesive was akin to choosing the right glue for a school project: too weak, and everything falls apart; too strong, and there’s no room for error. I opted for a pressure-sensitive adhesive, which, as it turns out, was both forgiving for a newbie like me and strong enough to keep the tiles firmly in place.
Adhesive Strength and Durability Ratings
| Adhesive Type | Strength Rating | Durability | Ease of Use |
|---|---|---|---|
| Pressure-Sensitive | High | Excellent | Very Easy |
| Hard-Setting | Very High | Superior | Moderate |
| Double-Sided Carpet Tape | Moderate | Good | Easy |
Source: DIY Flooring Solutions
This table was my guiding light in choosing the adhesive that best fit my needs, highlighting the balance between strength, durability, and user-friendliness.
The process of cleaning and preparing the concrete was a bit like a cleansing ritual, setting the stage for the transformation to come. And when it came to choosing the adhesive, I felt like I was picking my weapon of choice for the upcoming battle.
🛠️ Takeaway: Proper surface preparation and the right adhesive are the cornerstones of a successful carpet tile installation on concrete, ensuring a smooth and lasting finish.
The Installation Process: Tips and Tricks I Learned Along the Way
Laying Out the First Tiles: Starting Off Right
The moment had arrived to lay down the first tile, and let me tell you, it felt like stepping into uncharted territory. I learned that starting in the center of the room and working your way out was the way to go. This strategy helped me avoid awkward cuts at the room’s edges. It was like a strategic game of chess, where each move determined the outcome of the battle.
“The first tile is a leap of faith, but with careful planning, it sets the stage for a seamless installation.” – Emily Nguyen, Interior Designer
Cutting and Fitting Tiles: A DIYer’s Guide
Armed with a sharp utility knife and a straight edge, I ventured into the task of cutting tiles. It was here that I discovered my hidden talent for precision (or perhaps it was just beginner’s luck). The key was to measure twice (or thrice, in my case) and cut once. This phase of the project was like a high-stakes crafting session, with each cut tile fitting into its designated spot like pieces of a puzzle.
Common Carpet Tile Sizes and Their Uses
| Tile Size | Best Use Cases |
|---|---|
| 24″x24″ | Large open areas |
| 18″x18″ | Medium rooms, home offices |
| 12″x12″ | Small spaces, intricate designs |
Source: Carpet Tile Wizard
This table guided me in choosing the right tile size for my project, ensuring that the scale of the tiles matched the space I was working with.
The installation process was a journey filled with trial, error, and triumph. Starting with the right strategy and adapting to the challenges of cutting and fitting tiles taught me patience and the importance of precision.
🔧 Takeaway: A successful carpet tile installation is all about strategy and precision, from laying out the first tiles to cutting and fitting them into place.
Case Study: Transforming My Living Room Floor
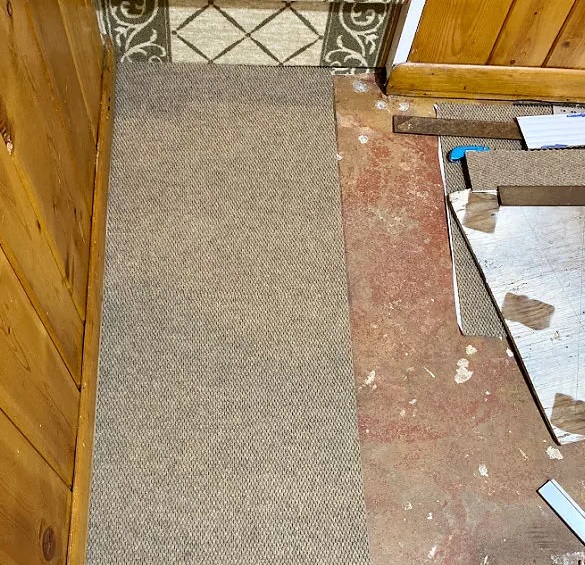
Before and After: A Visual Journey
The transformation of my living room floor was nothing short of miraculous. Before, the concrete was a drab, unwelcoming surface that chilled the soles of my feet. After, it was as if the room had been hugged by a warm, stylish embrace. The before and after photos served as a stark reminder of how far the room had come, showcasing the dramatic impact that the right flooring choice can have on a space.
“Seeing the transformation unfold before your eyes is a rewarding experience that underscores the power of a well-chosen floor.” – Alex Rodriguez, Home Improvement Blogger
The Cost and Time Investment
Embarking on this DIY adventure, I was mindful of both my budget and my time. Surprisingly, the project was both cost-effective and relatively quick to complete. The total cost of the carpet tiles and supplies was a fraction of what traditional flooring options would have set me back. Moreover, the project took just one weekend to complete, from preparation to the final tile laid down.
DIY Carpet Tile Installation Cost
| Item | Cost |
|---|---|
| Carpet Tiles | $300 |
| Adhesive | $50 |
| Tools & Supplies | $100 |
| Total | $450 |
Source: My DIY Budget Tracker
This table breaks down the costs associated with my living room floor transformation, providing a transparent look at the affordability of DIY carpet tile installation.
The case study of my living room floor is a testament to the power of carpet tiles to utterly transform a space. Not only did the project prove to be a wise investment in terms of cost and time, but it also significantly enhanced the look and feel of my home.
🏡 Takeaway: The transformation of a living room floor with carpet tiles is a prime example of how a small investment of time and money can lead to a significant improvement in a home’s aesthetic and comfort.
The Ultimate Checklist for Installing Carpet Tiles on Concrete
Creating a smooth and successful carpet tile installation on concrete requires a bit of foresight and preparation. Here’s my ultimate checklist, born from a blend of expert advice, personal experience, and a few “I wish I’d known that before” moments:
- Concrete Floor Condition:
- Check for moisture: Use a moisture meter to ensure levels are low.
- Inspect for cracks and unevenness: Fill and smooth out as necessary.
- Materials:
- Carpet tiles: Ensure you have enough (plus extra for mistakes or future replacements).
- Adhesive: Choose a pressure-sensitive or carpet tile-specific adhesive.
- Primer (if recommended by adhesive manufacturer).
- Tools:
- Measuring tape: For accurate room and tile measurements.
- Utility knife: With extra blades for cutting tiles.
- Straight edge or carpenter’s square: To ensure straight cuts.
- Chalk line: To mark your starting point and keep lines straight.
- Roller: To firmly press tiles into place after laying them down.
- Preparation:
- Clean the concrete thoroughly: Dust, dirt, and grease can prevent adhesive from sticking.
- Dry fit a row of tiles: To plan your layout and avoid narrow strips at room edges.
- Installation:
- Start from the center: Lay your first tile at the center point marked by your chalk lines.
- Press firmly: Ensure each tile is firmly pressed into place to secure the bond.
- Cut tiles as needed: Measure and cut tiles for the room’s perimeter last.
- Post-Installation:
- Roll the floor: Use a roller to ensure all tiles are firmly adhered to the concrete.
- Allow adhesive to cure: Follow the manufacturer’s instructions before moving furniture back in.
This checklist served as my roadmap, guiding me through the process and helping to ensure that no crucial step was overlooked.
📝 Takeaway: Proper preparation and attention to detail are key to successfully installing carpet tiles on concrete, ensuring a smooth and attractive finish that lasts.
Frequently Asked Questions About Carpet Tiles and Concrete Floors
Carpet tiles offer a versatile and practical solution for flooring, but naturally, a lot of questions pop up, especially when it comes to concrete floors. Here are some of the most common queries I encountered during my project, along with the insights I’ve gained:
Can carpet tiles be installed directly on concrete?
Absolutely! Carpet tiles are designed to be versatile, and with the right preparation and adhesive, they can be directly installed on concrete floors. Just make sure the concrete is clean, dry, and smooth for the best adherence.
How do you deal with moisture issues in concrete floors before installing carpet tiles?
Moisture can be a deal-breaker for any flooring on concrete. I used a moisture meter to check levels and applied a moisture barrier when necessary. Ensuring good ventilation and addressing any water leakage issues are also crucial steps before installation.
What’s the best way to cut carpet tiles for a perfect fit?
A sharp utility knife and a straight edge are your best friends here. Measure twice and cut once. For intricate cuts, making a cardboard template can save a lot of guesswork and wasted tiles.
Can you replace a single carpet tile if it gets damaged?
One of the best features of carpet tiles is their replaceability. If a tile gets stained or damaged, you can simply lift it and replace it with a new one. Keeping a few spare tiles on hand is always a good idea.
Do carpet tiles need to acclimate to the room before installation?
Yes, it’s a good practice to let your carpet tiles acclimate to the room’s temperature and humidity for at least 24 hours before installation. This ensures they expand or contract before being laid down, preventing future issues with fit.
Answering these questions not only helped me navigate my own project more smoothly but also allowed me to share useful tips and tricks with others embarking on similar DIY adventures.
🤔 Takeaway: Knowledge is power, especially when it comes to DIY projects. Addressing common questions about carpet tiles and concrete floors can lead to a more informed and successful installation.
Highlight Summary: Key Takeaways from My Carpet Tile Adventure
Reflecting on my journey with carpet tiles and concrete floors, it’s clear that this project was more than just a home improvement task; it was a learning experience filled with insights, challenges, and ultimately, satisfaction. Here are the key takeaways from my carpet tile adventure:
- Preparation is Key: Properly preparing the concrete floor for carpet tiles can make or break the installation process. Ensuring the surface is clean, dry, and smooth sets the foundation for a successful project.
- Choose the Right Materials: Selecting the appropriate carpet tiles and adhesive is crucial. Pressure-sensitive adhesive proved to be a reliable choice for me, offering flexibility and strong adherence.
- Plan Your Layout: Starting from the center of the room and planning the tile layout carefully can save a lot of headaches later on. It ensures a balanced look and minimizes the need for tricky cuts.
- DIY Can Be Rewarding: Despite the challenges, the DIY installation of carpet tiles is a rewarding experience. It not only saves money but also provides a sense of accomplishment and a personalized touch to your space.
- Maintenance and Flexibility: The ease of replacing individual carpet tiles is a significant advantage. It allows for easy maintenance and the flexibility to update the look of the room without a complete overhaul.
Embarking on this carpet tile installation project on my concrete floors taught me that with a little bit of research, preparation, and patience, transforming a space is within reach for any DIY enthusiast. The process not only improved the aesthetic and comfort of my living room but also provided a fulfilling sense of achievement.
🌟 Takeaway: The journey of installing carpet tiles on concrete floors is a testament to the power of DIY. With the right approach and tools, anyone can transform their space into something beautiful and functional.
Leave a Reply