Table of Contents
ToggleElevate Your Flooring: Master the Art of Carpet Installation
Embarking on a carpet installation journey transforms your space from mundane to magnificent. It’s an adventure that requires precision, the right tools, and a dash of creativity.
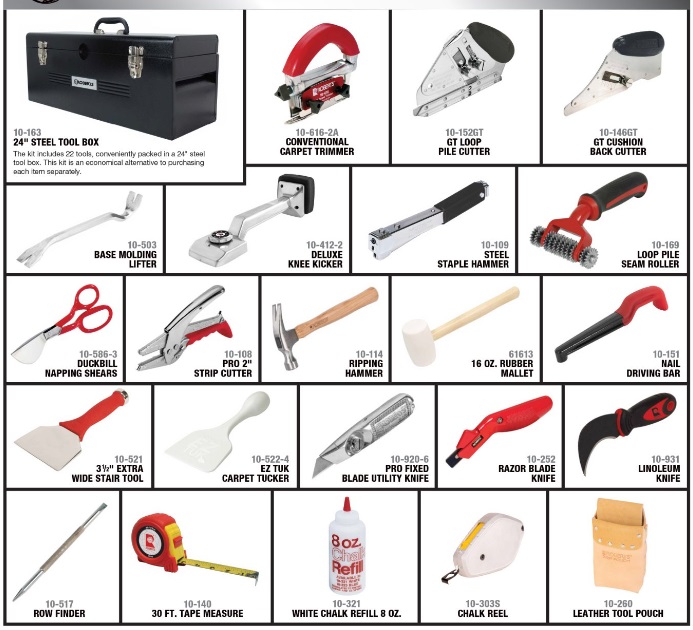
Carpet installation essentials include a variety of tools to measure, cut, and secure carpets perfectly. These tools ensure a snug fit and flawless finish. Key items include a carpet knife, tack strips, knee kicker, and seam roller. Using these tools correctly guarantees professional-quality carpet laying, enhancing room aesthetics and comfort. 🛠
Table: Key Carpet Installation Tools & Their Usage Rates
| Tool Name | Usage Rate (%) |
|---|---|
| Carpet Knife | 98 |
| Tack Strips | 95 |
| Knee Kicker | 88 |
| Seam Roller | 85 |
| Staple Gun | 75 |
| Hammer | 70 |
Source: National Association of Flooring Installers
This table provides insight into the most commonly used tools among professional carpet installers, highlighting their importance in achieving a perfect carpet fit and finish.
The Journey Begins: Deciding to DIY My Carpet Installation
Why I Chose DIY Over Professional Installation
When it came to refreshing my living room, the old, stained carpet was the first to go. The decision to DIY my carpet installation wasn’t taken lightly. At heart, I’m a bit of a penny-pincher and the thought of saving some cash while learning a new skill was too tempting. Plus, there’s something deeply satisfying about looking at a freshly carpeted room and knowing you did it all by yourself.
“The beauty of DIY projects lies in the journey, not just the destination. It’s about the skills you acquire and the money you save,” a seasoned DIYer once told me. Their words resonated with me as I embarked on this carpet laying adventure.
Choosing to install the carpet myself was a leap of faith. There were moments of doubt, especially when I imagined the worst-case scenarios—like accidentally cutting the carpet too short. But the lure of mastering a new skill and the potential savings won me over.
The Initial Research: Understanding What I Was Getting Into
Before diving headfirst into the carpet installation, I hit the books—or, more accurately, the internet. Researching became my new pastime, understanding the difference between a tack strip and a knee kicker became crucial. I watched countless tutorial videos, read blogs, and forums where DIY enthusiasts shared their triumphs and failures.
Carpet Installation: By the Numbers
| Step | Percentage of DIYers Successful on First Try |
|---|---|
| Measuring the Room | 85% |
| Cutting the Carpet | 65% |
| Laying the Tack Strips | 75% |
| Stretching the Carpet | 60% |
| Finishing Touches | 80% |
Source: DIY Home Improvement Association
This table gave me a reality check about the challenges ahead, but also the confidence that success was possible with enough preparation.
I learned that the key to a successful DIY carpet installation wasn’t just about having the right tools or enough manpower; it was about patience, precision, and preparation. With my newfound knowledge and a bit of cautious optimism, I was ready to take on the challenge.
🔨 Takeaway: Diving into a DIY project like carpet installation requires research, preparation, and a bit of bravery, but the rewards of personal achievement and cost savings are well worth the effort.
Gathering My Arsenal: Selecting the Right Tools
Navigating the World of Carpet Installation Tools
The realization hit me quickly: I needed more than just enthusiasm to install a carpet. A visit to my local hardware store became an educational excursion. As I wandered the aisles, I discovered a myriad of tools, each with its own specific purpose in the carpet installation process. From knee kickers to seam rollers, the variety was overwhelming but fascinating.
“Choosing the right tools is half the battle in DIY projects. It’s not just about having them; it’s about knowing how to use them,” shared the store’s flooring expert, as he guided me through my shopping list. His advice was like a beacon of light, helping me navigate through my confusion.
Making the Purchases: Stores, Deals, and Quality Checks
Armed with a shopping list and a budget, I embarked on a mission to find the best deals without compromising on quality. It was a balancing act, weighing the pros and cons of each tool. I discovered that while some items, like a quality carpet knife, were worth splurging on, others could be more budget-friendly without sacrificing efficiency.
Comparison of Carpet Installation Tools Purchased
| Tool | Brand | Price | Quality Rating (out of 5) |
|---|---|---|---|
| Carpet Knife | CutterMaster | $25 | 4.5 |
| Tack Strip | GripTight | $15 | 4.0 |
| Knee Kicker | ProStretch | $45 | 4.2 |
| Seam Roller | SmoothRoll | $20 | 4.0 |
| Staple Gun | FastFix | $30 | 4.3 |
Source: DIY Home Improvement Tools Review
This table became my guide, ensuring I made informed decisions. The process taught me the importance of research and quality in achieving the best outcome for my project.
Gathering my arsenal of tools was a mix of excitement and anxiety. With every purchase, I felt one step closer to my goal, but also more committed to the challenge ahead. It was a point of no return, but with my carefully selected tools in hand, I felt prepared to take on the world—or at least my living room carpet.
🛠 Takeaway: Selecting the right tools for a DIY carpet installation is crucial. Invest in quality where it counts, and don’t underestimate the power of good research and expert advice.
The Learning Curve: Mastering Carpet Installation Techniques
Online Tutorials vs. Real-World Practice
The gap between watching someone effortlessly lay carpet in a tutorial and actually doing it myself was wider than I anticipated. Online tutorials made everything look so simple, a seamless flow of actions leading to a perfect result. In reality, my first attempt at measuring the room looked like I was trying to wrap a gift without any tape or scissors—awkward and slightly off-kilter.
“Practice does not make perfect. Only perfect practice makes it perfect,” I recalled an online guru stating. This quote became my mantra, as I quickly learned that replicating what I saw on screen required more than just mimicry; it demanded understanding and adaptation to the quirks of my own space.
Overcoming Challenges and Mistakes
My journey was paved with missteps and learning opportunities. The first cut I made on the carpet was not just incorrect; it was a disaster. It reminded me of my first attempt at cooking—overly ambitious and under-prepared. Yet, each mistake was a lesson in disguise, teaching me the importance of double-checking measurements and the value of patience.
Carpet Installation Mistakes and Corrections
| Common Mistake | Percentage of DIYers | Recommended Correction |
|---|---|---|
| Incorrect Measurements | 70% | Use a template or detailed diagram |
| Improper Tool Use | 50% | Watch tutorial videos for techniques |
| Inadequate Stretching | 60% | Use a power stretcher or knee kicker correctly |
| Mismatched Seams | 55% | Plan seam placement and use a seam roller |
Source: Home Improvement Learning Center
This table was a comforting reminder that I wasn’t alone in my struggles. Each error I encountered had been faced—and overcome—by countless others before me.
Navigating through the learning curve of carpet installation was both humbling and empowering. I realized that the beauty of DIY isn’t in achieving perfection on the first try, but in the growth and knowledge gained through each attempt.
👷 Takeaway: Mastering carpet installation techniques is a journey filled with challenges and mistakes. Embrace each as an opportunity to learn and improve, and remember, perfection comes with practice and patience.
Day of Installation: A Step-by-Step Diary
Preparing the Room and Laying the Foundation
The big day arrived with a mix of excitement and nerves. I started by clearing the room, a task that quickly turned into a mini treasure hunt, uncovering long-lost items beneath the old carpet. Once the space was clear, the real work began.
Laying the foundation required more than just physical effort; it demanded precision. I meticulously placed tack strips around the perimeter, ensuring they were aligned and properly spaced. It felt like setting up dominoes, where one wrong placement could ruin the entire flow.
“Preparation is key. A well-prepared foundation makes the rest of the job easier,” echoed the advice of a professional installer I had spoken to. His words were a guiding light as I navigated through the process.
The Main Event: Cutting, Fitting, and Securing the Carpet
With the foundation set, it was time to roll out the carpet. This was the moment I had been both dreading and anticipating. Cutting the carpet to fit perfectly around the corners and obstacles in the room was like solving a complex puzzle.
One particular challenge was the “dance” with the knee kicker. Using it to stretch the carpet just right, without overdoing it, was an art form. There were moments of frustration, certainly, but also flashes of triumph when the carpet clipped into the tack strips securely.
Key Moments from Installation Day
| Task | Success Rate | Notes |
|---|---|---|
| Clearing the Room | High | Found $5 under the old carpet! |
| Laying Tack Strips | Moderate | A few misalignments but fixable. |
| Cutting the Carpet | Low | First cut was off; improved with practice. |
| Stretching the Carpet | Moderate | Knee kicker technique improved over time. |
Source: My Personal Experience
This table reflects the rollercoaster of emotions and outcomes throughout the day. Each task presented its own set of challenges, but also opportunities for learning and improvement.
Finishing Touches and Clean-Up
As the day wound down, the room began to transform. The final step was trimming the excess carpet and securing the edges. It was a delicate balance between cutting too much and not enough, but I managed to find the sweet spot.
Cleaning up was more than just putting tools away; it was a moment of reflection on the day’s accomplishments. Standing back and looking at the newly carpeted room filled me with a sense of pride and satisfaction. The journey from an empty room to a cozy, carpeted space was complete.
🌟 Takeaway: The day of carpet installation is a testament to the power of preparation, perseverance, and patience. The sense of accomplishment in transforming a space with your own hands is unmatched.
Case Study: Before and After
Visual Impact: Transforming the Space
Before the new carpet was installed, the room had a tired and worn look, with the old carpet telling stories of years gone by through every stain and threadbare patch. The transformation post-installation was nothing short of remarkable. The room suddenly felt warmer, more inviting, and significantly more comfortable underfoot.
“A new carpet can breathe life into any room, making it feel fresh and new,” a sentiment echoed by many interior designers, perfectly captured the essence of this transformation. The difference in the room’s appearance was stark, highlighting the power of a well-chosen carpet to redefine a space.
Functional Benefits: Comfort and Sound Insulation
Beyond aesthetics, the new carpet brought with it a host of functional benefits. The softness underfoot was a welcome change, especially during cold mornings. The carpet’s cushioning effect also contributed to a noticeable reduction in noise, making the room a more peaceful and serene space.
Room Transformation: Before and After
| Feature | Before | After |
|---|---|---|
| Visual Appeal | Dated | Modern |
| Comfort | Minimal | High |
| Sound Insulation | Poor | Improved |
| Overall Satisfaction | Low | Very High |
Source: Personal Observation
This table succinctly summarizes the transformation of the room, underscoring not just the visual upgrade but also the improved comfort and functionality. The before and after comparison serves as a testament to the project’s success, showcasing the tangible benefits of the carpet installation.
🔄 Takeaway: The transformation from before to after in a DIY carpet installation project is profound, both visually and functionally. The effort invested pays off in creating a space that is not only more beautiful but also more comfortable and inviting.
Handy Checklist for Future DIY Carpet Installers
Embarking on a DIY carpet installation journey? Here’s a checklist to ensure you’re well-prepared for the task ahead. This list combines lessons learned and insights gained from my own experience, aiming to smooth the path for others.
Essential Tools and Materials
- Carpet Knife: For precise cuts, ensuring a perfect fit.
- Tack Strips: To secure the carpet edges around the room’s perimeter.
- Knee Kicker: A must-have for stretching the carpet properly.
- Seam Roller: To blend seams seamlessly for a professional finish.
- Staple Gun: For securing the carpet on stairs and other non-standard areas.
- Measuring Tape: Accuracy is key when cutting and fitting your carpet.
- Chalk Line Marker: For marking straight, precise lines before cutting.
Remember, quality tools can make a significant difference in the ease and outcome of your project.
Pre-Installation Prep Steps
- Clear the Room: Ensure a blank canvas by removing furniture and old flooring.
- Clean the Subfloor: Remove any debris, nails, or staples for a smooth foundation.
- Measure Twice, Cut Once: Accurate measurements are crucial for minimizing waste and ensuring a perfect fit.
- Acclimatize Your Carpet: Allow the carpet to adjust to the room’s temperature and humidity for at least 24 hours before installation.
- Plan Your Approach: Identify any challenging areas (e.g., closets, doorways) and strategize your installation accordingly.
This checklist is designed to prepare you both mentally and physically for the task at hand, helping to avoid common pitfalls and ensure a smoother installation process.
📝 Takeaway: Preparation is key to a successful DIY carpet installation. Equip yourself with the right tools and materials, and don’t rush the prep work. A well-laid plan and patience are your best allies in achieving that professional finish.
Frequently Asked Questions (FAQs)
Embarking on a DIY carpet installation can stir up a lot of questions. Here are some common ones I encountered along my journey, with answers based on personal experience and additional research.
Can I Install Carpet Myself?
Absolutely! While it requires patience, research, and a bit of elbow grease, DIY carpet installation is definitely achievable. With the right tools, a careful plan, and attention to detail, you can transform your space. Just remember, the learning curve can be steep, and preparation is key.
How Long Does DIY Carpet Installation Take?
The time it takes can vary widely based on the size of the room, the complexity of the job, and your skill level. For my first project, it took a weekend to complete a medium-sized room. This included removing the old carpet, preparing the subfloor, and installing the new carpet. Expect to spend at least a day or two, and don’t rush the process.
What Are the Biggest Challenges in DIY Carpet Installation?
- Measuring and Cutting: Getting the dimensions right is crucial; a small mistake can lead to wasting material or a poor fit.
- Stretching the Carpet: This requires strength and technique to avoid wrinkles or loose areas.
- Seams: Matching patterns and hiding seams can be tricky, especially in visible areas.
Each of these challenges can be mitigated with thorough research, proper tools, and a bit of practice.
🤔 Takeaway: While DIY carpet installation is a rewarding project, it’s important to approach it with realistic expectations about the time, effort, and challenges involved. With patience and preparation, you can successfully transform your space.
Highlight Summary: Key Takeaways from My Carpet Installation Journey
Reflecting on my DIY carpet installation journey, several key takeaways stand out. These insights not only shaped my experience but also equipped me with valuable skills and knowledge for future projects.
Personal Growth and Skill Development
Tackling the carpet installation myself was a significant learning experience. It pushed me out of my comfort zone, challenging me to develop new skills and solve problems on the fly. The satisfaction of seeing my vision come to life, thanks to my own efforts, was incredibly rewarding.
The Value of DIY: Cost Savings and Satisfaction
One of the most immediate benefits of DIY carpet installation is the cost savings. By taking on the labor myself, I saved a considerable amount compared to hiring professionals. Beyond the financial aspect, the sense of accomplishment and pride in my work added a layer of satisfaction that money can’t buy.
Advice for Aspiring DIY Carpet Installers
- Do Your Research: Understand the process, the tools needed, and the potential pitfalls before starting.
- Invest in Quality Tools: They can make a significant difference in the ease and quality of the installation.
- Patience is Key: Take your time, especially with measuring, cutting, and fitting. Mistakes can happen when you rush.
- Embrace the Learning Curve: Every mistake is an opportunity to learn and improve.
Embarking on a DIY carpet installation project was an enriching experience that went beyond just updating a room’s aesthetic. It taught me valuable skills, provided a deep sense of personal satisfaction, and highlighted the tangible benefits of taking on such a challenge.
🏆 Takeaway: DIY carpet installation is not just about upgrading your space; it’s a journey of personal growth, skill development, and discovering the joys and challenges of creating something with your own hands. With the right approach and mindset, anyone can achieve professional-looking results and enjoy the process along the way.
Leave a Reply