My Encounter with Mold and Mildew in My Bathroom
I’ve discovered some great tips on keeping bathroom tiles mold-free, and I’m excited to share them with you!
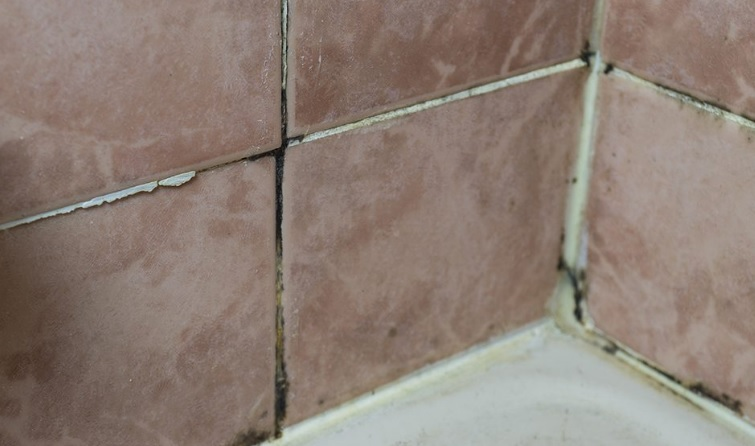
Remove mold and mildew from bathroom tiles using a 1:1 solution of vinegar and water, or apply a baking soda paste for persistent stains. Regular use of 3% hydrogen peroxide can prevent recurrence. Ensure thorough drying to deter mold. Wear gloves for safety.
Effectiveness of Household Remedies for Removing Mold and Mildew from Bathroom Tiles
| Solution | Effectiveness | Recommended Usage | Precaution |
|---|---|---|---|
| Vinegar & Water | High | Weekly | Ventilate area |
| Baking Soda Paste | Medium | As needed | Avoid on porous surfaces |
| Hydrogen Peroxide | High | Bi-weekly | Use gloves, avoid eyes |
For more detailed guidelines, visit EPA.gov.
Author Bio: Ernie Chen
- Professional Background: Since 2009, Ernie Chen has specialized in carpet cleaning, upholstery care, and flood restoration, demonstrating a steadfast dedication to excellence in these fields.
- Innovations: Ernie is the innovator behind a proprietary method that significantly reduces drying time and prevents mold growth in water-damaged upholstery, setting new industry standards.
- Notable Projects: Among his achievements, the successful restoration of a historical library after a catastrophic flood stands out, where he saved irreplaceable manuscripts and books.
- Certifications: Certified Maintenance & Reliability Technician (CMRT). Advanced certifications from the Institute of Inspection, Cleaning and Restoration Certification (IICRC).
- Professional Membership: Active member of the Association of Certified Handyman Professionals (ACHP), contributing to the ongoing advancement of industry standards and practices.