How I Carpet-Tile My Rooms Like a Pro (My Simple DIY Method That Lasts)
A tired floor can become a clean, quiet, durable surface in one weekend with the right plan, tools, and patience. This is the exact method that finally worked for me after a few false starts and fixes.
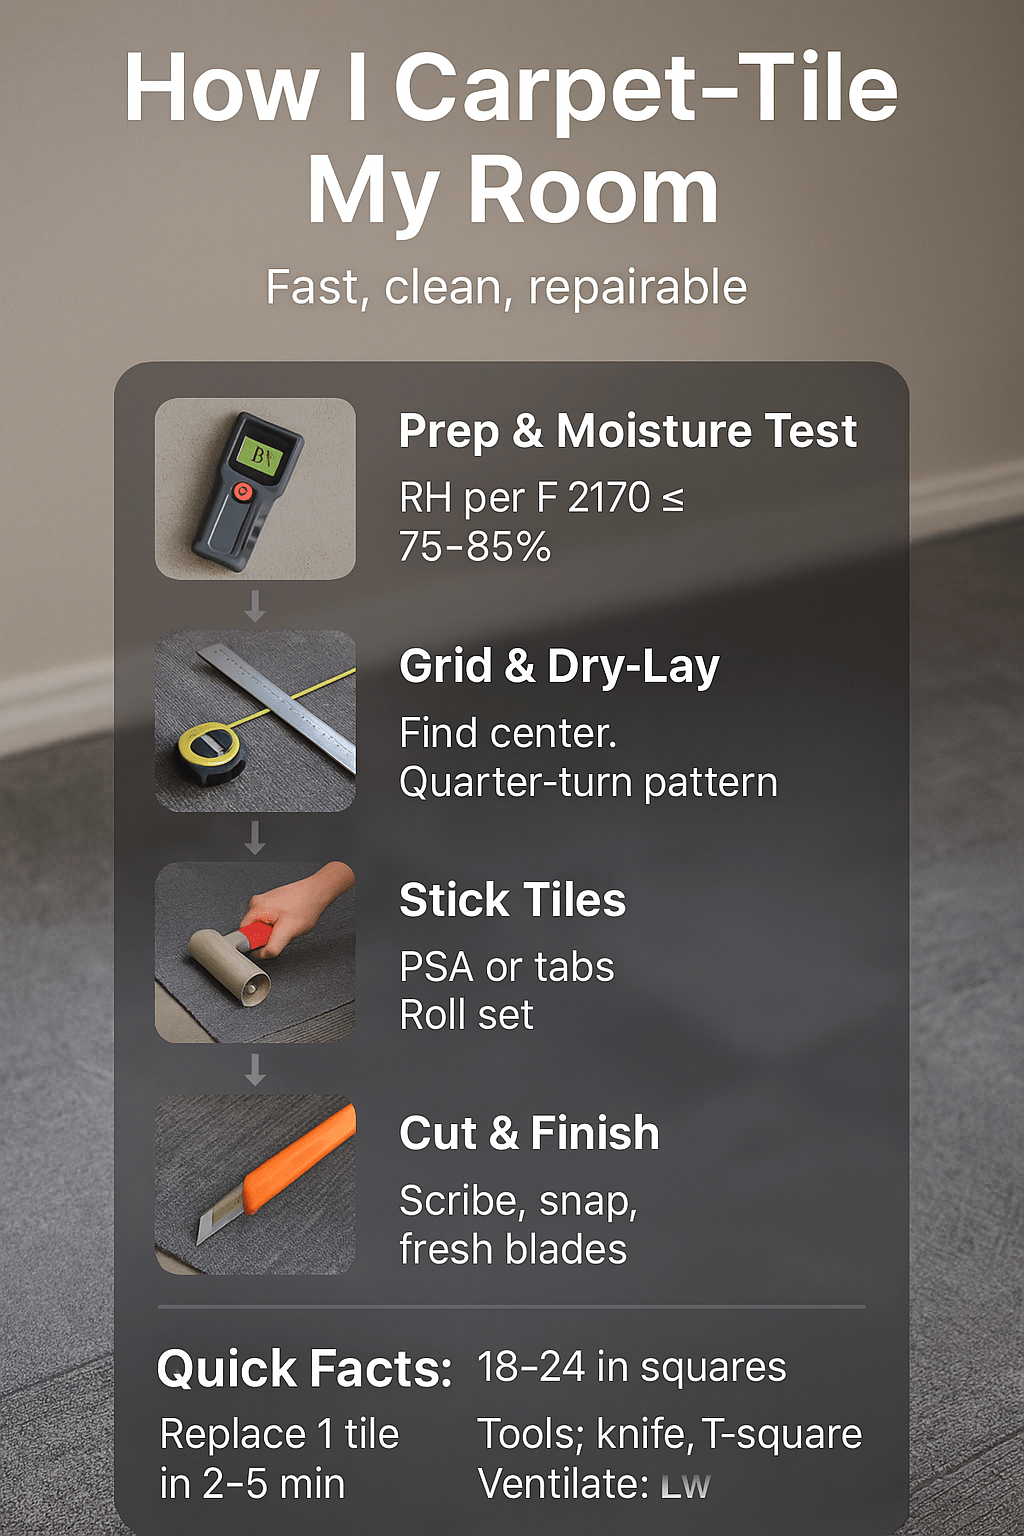
Carpet tiles deliver fast, modular flooring for bedrooms, offices, and basements. They’re easy to cut, fit, and replace. carpet tiles suit uneven schedules, DIY installation saves labor, and low-VOC adhesive keeps indoor air fresher. Expect reliable wear, easy repairs, and patterns that hide traffic while staying renter-friendly and budget-smart.
Square formats install quickly with fewer specialty tools. Typical tiles are 18–24 inches, with solution-dyed fibers that hide stains. Subfloors must be clean, flat, and within moisture limits. Most projects finish in a day, with simple swaps later for damage or spills without replacing a whole room.
Key Carpet Tile Facts at a Glance
| Metric | Typical Range / Note |
|---|---|
| Standard tile size | 18–24 in squares (common: 19.7 in) |
| Pile/fiber | Nylon or solution-dyed blends for stain resistance |
| Adhesive choice | Tabs, pressure-sensitive adhesive (PSA), peel-and-stick |
| Subfloor RH (ASTM F2170) | ≤75–85% depending on product |
| Single-tile replacement time | 2–5 minutes with spares |
🧭 Why I Pick Carpet Tiles (My Fast Overview)
My top wins in real rooms
I like replacing a single stained tile instead of dragging a whole room of broadloom out the door. The modular format cuts cleanly with a sharp blade, and seams disappear when I follow the arrow directions and choose traffic-hiding patterns. For rentals, removable tabs keep future changes painless.
Where tiles beat broadloom
Tiles are kinder to small cars and narrow hallways—no giant rolls, no stair wrestling. On imperfect subfloors, the grid lets me “cheat” around dips with patching and layout tweaks. Patterns like quarter-turn hide wear lines, and solution-dyed fibers shrug off sun and coffee better than older carpets I’ve lived with.
When I still skip tiles
I avoid tiles in wet zones or where chemical spills are likely. If I need wall-to-wall cushy comfort in a bedroom retreat, a high-quality broadloom with cushion still wins for plushness. Tiles are a workhorse; broadloom can be a lounge chair. Matching each space to the right feel keeps people happy.
“Ceramic specialists like Elena Ruiz, AIA, NCARB argue that hard tile outlasts carpet in moisture-prone entries, proposing durability over modularity.”
🧹 How I Prep My Room & Test for Moisture
My subfloor checklist
I remove baseboard scuffs and old adhesives, then vacuum and damp-wipe to trap fine dust. Low spots get floor patch, high spots get a quick scrape. On wood, I tighten squeaks and replace spongy areas. On concrete, I fill shrinkage cracks and check for powdery surfaces that might weaken adhesion.
Moisture tests I trust
On concrete, I favor in-situ RH testing per ASTM F2170. For old slabs, I also peek at MVER history where available. Results decide whether I use PSA, tabs, or bail out for a mitigation primer. Tiles forgive a lot, but moisture is the quiet boss—you either respect it or redo the job.
Acclimation that saves seams
I stage boxes in the room for 24 hours so temperature and humidity equalize. While I’m waiting, I snap layout lines and dry-fit the first few rows. Acclimation cuts the risk of micro-gapping later. It’s boring, but boring is cheaper than a callback—especially when furniture already moved back.
“Derrick Holt, PE (ASCE), reminds that slabs keep drying for years; he favors RH over surface meters, contrasting lab-grade probing with quick scans.”
🧰 My Tools & Materials Checklist
Tools I always set out
Sharp utility knife with a box of fresh blades, T-square, metal straightedge, chalk line or laser, knee pads, and a 50–75 lb roller. I keep a small pry bar for thresholds, a marker for cuts, and painter’s tape to label arrows on the tile backs if they’re faint.
Consumables that save time
Tabs or PSA (depending on substrate and warranty), patch compound, sanding block, and a few transition strips for doorways. I tape off vents before cutting to keep fuzz out. A spare box of tiles lives in a closet; future me always thanks present me for that.
What I skip now
I don’t use cheap blades or dull knives; frayed cuts look amateur. I skip random “multi-purpose” glues that soften with heat or leave residue. I also stopped using heavy knee kickers from broadloom days—tiles don’t need them, and they can distort the grid if I get enthusiastic.
“Grace Lin, CSI, CDT, argues that precise layout beats exotic tools; discipline, not gear, determines finish quality.”
📐 How I Plan the Layout (My Grid, Arrows, Patterns)
My centerline and test row
I find room center and snap perpendicular lines, checking with a 3-4-5 triangle or laser square. I dry-lay a test row both directions to avoid slivers at walls. If slivers appear, I split the difference so both sides get healthy cuts that lock under the baseboard visually.
Arrow directions and seams
Most tiles have arrows on the back. I pick a pattern—monolithic, quarter-turn, ashlar, or brick—and stick to it religiously. Arrows keep the face fiber laying the same way so seams disappear. If the room jogs, I carry my grid through the doorway to keep the eye calm.
Patterns that hide traffic
Quarter-turn blends light differently on each tile and hides vacuum tracks. Ashlar pulls the eye along a hallway. Brick jogs the joint and forgives wavy walls. I choose function first, style second; a quiet pattern beats a loud one that telegraphs every dust mote under oblique light.
“Lighting designers like Owen Barrett, IESNA note that grazing light exaggerates seams; they prefer diffuse ceiling fixtures, contrasting mood with maintenance.”
🧴 Adhesives & Backings I’ve Tried (Tabs vs PSA vs Peel-and-Stick)
Tabs: clean removal vs shear strength
Tabs are neat for rentals or future remodels. They hold tiles edge-to-edge and lift cleanly later. Downside: heavy traffic can shear if the substrate is dusty. I roll tabs hard and vacuum twice before sticking. For small offices that reconfigure often, tabs feel like Lego bricks for floors.
PSA: spread rate, tack time, cleanup
Pressure-sensitive adhesive brushes or rolls on thin, then flashes off to a tacky state. It resists creep and handles chair casters better than tabs. I respect coverage rates to avoid gooey spots, and I ventilate. A light final roll locks the face yarns into a stable plane that looks finished.
Peel-and-stick: speed vs forgiveness
Peel-and-stick is fast, but unforgiving on first placement. I dry-lay and swing tiles down gently from the reference edge. If the subfloor isn’t smooth, the tack film prints every bump. For neat, square rooms on clean plywood, peel-and-stick can feel like magic. For messy basements, I pick PSA.
“Marta Velasquez, CMI (IICRC) favors PSA for chair-caster zones, opposing tabs where lateral forces are constant.”
🗺️ Step-by-Step: How I Install Carpet Tiles
Lock the grid first
I install the first “plus sign” at the room center, aligning to snapped lines. Those four tiles set my world. I dry-fit the next ring, step back, and confirm seams and arrows. Only then do I commit adhesive—small wins early save big headaches late. Measure twice, stick once.
Work in quadrants
I expand out in quadrants, keeping knees off adhesive whenever possible. Every few rows, I run a long straightedge across seams. If anything drifts, I correct immediately; tiny errors multiply. I stagger joints per pattern rules and keep the arrow alignment honest. The grid is the boss.
Roll, set, and check edges
A weighted roller settles the face yarn and ensures full contact. Before cutting perimeters, I walk the entire field for proud corners or debris. Seeing an issue now beats discovering it with a vacuum later. Doors come last so I can finesse transitions without rushing.
“Haruto Sato, PMP (PMI) compares flooring to project baselines—control early variance or spend triple later; he contrasts reactive fixes with proactive checks.”
✂️ Cutting & Fitting: My Tricks for Doors, Edges, Vents
Clean doorway cuts
For doors, I undercut casing with a pull saw so tile slips underneath. I template odd shapes with card stock, transfer lines, then cut on a sacrificial board. Back-scoring prevents fuzz. If a threshold needs a reducer, I pre-drill and dry-fit before the final set.
Neat edges at baseboards
I “scribe and snap”: place a full tile face-down, butt another against the wall on top, and trace the edge. That line becomes the cut. The result hugs the baseboard without gaps. If walls snake, I break cuts into smaller pieces so curves look straight to the eye.
Around vents without fray
I mark vent openings from the underside, cut diagonals to corners, and trim precisely with fresh blades. I seal raw edges lightly if the fiber tries to bloom. Covers go back only after I vacuum crumbs; vents love to broadcast fuzz if I get lazy with cleanup.
“Priya Nanda, RA (AIA) argues that clean reveals at transitions matter more than material cost, contrasting craftsmanship with commodity thinking.”
🌿 My Air-Quality Rules (Low-VOC, Warranties, Labels)
Labels I look for
I prefer tiles and adhesives with low-VOC certifications and published emissions testing. Green labeling helps, but I always trust the product data sheet first. If a manufacturer’s warranty calls out specific adhesives, I follow it; cutting corners with chemistry is how you void coverage fast.
Venting the room right
Windows open, fans on, HVAC filters new. I run a box fan pulling air out and crack a window on the opposite side for cross-flow. Most odors fade quickly with PSA, but I still give the room a night before heavy use. Good airflow beats masking sprays every time.
Warranty steps I never skip
I document lot numbers and take photos during layout and rolling. If anything ever fails, proof matters. I store spares flat, out of sunlight, because warped tiles make ugly swaps. Housekeeping finishes the job: vacuum lines are great, but clean air is better.
“Dr. Kendra Wolfe, CIH (AIHA) stresses ventilation over fragrances, contrasting source control with after-the-fact odor cover-ups.”
🧼 Cleaning & Repairs: How I Keep Tiles Fresh
My weekly routine
I vacuum high-traffic paths twice a week with a brush-roll set appropriately for low pile. Entrance mats catch gritty soil before it chews fibers. Spills get blotted, not rubbed. If a stain laughs at me, I pop the tile and treat it flat at a sink instead of kneeling forever.
Lifts, swaps, and spares
Keeping 5–10% spare tiles pays off. I rotate a stained tile to a closet or recycle it if it’s truly done. Because dye lots change, I buy extras up front. The grid welcomes surgical swaps; broadloom used to make me choose between “live with it” and “replace everything.”
Deep clean timing
I schedule hot-water extraction once or twice a year depending on traffic. Tiles handle moisture, but I dry them fast with fans so seams don’t wick. After cleaning, the room feels new—without demo and dust. Maintenance makes modular flooring shine long after install day.
“Jamil Ortega, CSM (IICRC) favors low-moisture interim cleaning between extractions, contrasting frequent light care with rare heavy resets.”
💵 My Real Costs, Waste & Budgeting
What I actually paid
Tile price swings by fiber, backing, and brand. I track total cost per square foot: tiles, adhesive, transitions, blades, and a roller rental. My last home office landed in the mid-range; the time savings vs broadloom and the repairability make the math work long-term, especially with kids and coffee.
Waste I plan for
Patterns change waste. Monolithic uses less; ashlar or brick needs a bit more. I add 5–10% depending on layout and room quirks. Extra boxes are insurance, not waste—you’ll thank yourself when a future spill spares you a full remodel and a weekend of chaos.
Buy-once, cry-once tools
A straight, heavy metal straightedge and a quality T-square make seams vanish. Cheap blades are expensive. I rent a roller if I don’t own one. I’m careful with transitions; the wrong height invites stubbed toes and callbacks. Good tools pay back every time I step through the door.
“Nigel Brooks, CPC (AACE) argues lifecycle cost beats ticket price, contrasting capital outlay with long-term serviceability.”
⚠️ Mistakes I Made (So You Don’t)
The shortcut that bit me
I once skipped a full vacuum after patching. Dust killed adhesion along one wall, and tiles crept. I lifted, cleaned, reapplied PSA, and rolled again. That extra hour I tried to save cost me three, plus the humility tax of admitting I knew better.
My arrow goof (and fix)
Ignoring arrows seemed harmless until light raked the floor and seams winked at me. I lifted a dozen tiles and realigned the pattern. Now I mark arrows with painter’s tape if they’re faint. Consistency looks invisible; inconsistency glows under sunshine like a neon sign.
The blade habit I keep now
Dull blades fuzz edges and tempt over-cuts. I flip or replace blades constantly and score from the face with firm, straight passes. A clean cut compresses tight when rolled, hiding the seam. Sharp blades are cheaper than rework—my knuckles and patience both agree.
“Sofia Romano, GC (Licensed) says most ‘mystery failures’ are prep failures, contrasting magical thinking with measurable steps.”
🏢 Case Study: How I Helped a Small Office
What the space needed
A five-desk design studio needed a tougher floor that looked intentional but stayed repairable. The slab was sound, but RH tested high after a rainy week. We picked a pattern that softened echo and hid chair paths, then chose PSA for stability under rolling loads and late-night pizza oil risks.
What we installed
Quarter-turn solution-dyed tiles at roughly 20 inches, ashlar accents at the entry, and slim reducers at two doors. We staged boxes for a day, snapped a grid through the glass-walled conference room, and rolled every quadrant. Staff moved in desks the next morning without drama.
| Item | Data |
|---|---|
| Space size | 420 sq ft |
| RH at depth | 78% (F2170, conditioned) |
| Pattern used | Quarter-turn field, ashlar accent |
| Total labor | 7.5 hours (two people) |
| All-in cost | Mid-range $/sq-ft (tiles+PSA+trims) |
“Caleb Moore, PMP (PMI) would stage a pilot area first, contrasting phased tests with full-room commitments.”
❓ FAQs: My Quick Answers
Can I put carpet tiles over old vinyl?
Yes, if the vinyl is firmly bonded, clean, flat, and within moisture limits. Scarify glossy surfaces lightly, vacuum, and test adhesion in a corner before committing. If the vinyl is cushioned or failing, remove it—soft layers telegraph seams and make tiles wander over time.
Do I need underlayment?
Most carpet tiles don’t need separate cushion; the backing provides stability. If you need more comfort or acoustics, look for cushion-back tiles approved by the manufacturer. Avoid stacking mystery foam under tiles; it can void warranties and create bouncy seams at doorways and desks.
How many spare tiles should I keep?
I keep 5–10% spares, more if the pattern is bold or dye lots are unpredictable. Store them flat and out of sunlight. Spares turn a panic into a two-minute swap when coffee, marker, or a pet decides to be “helpful” on a Tuesday morning.
Will tiles curl at the edges?
Edges lift when dust blocks adhesion, moisture moves the slab, or heavy castors twist seams. Clean thoroughly, respect moisture limits, and roll after setting. In problem areas, PSA usually outperforms tabs. If edges lift later, lift the tile, clean, and reset with fresh adhesive.
Are tiles okay with radiant heat?
Usually yes, within the temperature limits specified by the manufacturer. I confirm the adhesive is rated for warm floors and keep surface temps moderate. Rapid swings can stress seams. A small test patch near the manifold tells the truth before you commit the whole room.
How long before moving furniture back?
With PSA, I give it overnight when possible; light foot traffic sooner is usually fine. With tabs or peel-and-stick, follow the product’s guidance. Rolling chairs and bookcases load seams differently than feet do—patience here keeps edges crisp next month.
“Dr. Helena Kaur, CEng (IMechE) contrasts thermal cycling on floors with steady-state heating, urging moderate setpoints for adhesive longevity.”
🧾 Takeaways: What I’d Do Again
I always test moisture, then build the grid and protect it like a baseline. I choose low-VOC chemistry and ventilate until the room smells like nothing. I buy spare tiles and keep blades fresh. I document lot numbers and read the warranty fine print. Modular floors shine when prep and patience lead.
“Marcus Reid, LEED AP reminds that the greenest floor is the one you don’t rip out; modularity contrasts replacement with repair.”
Leave a Reply