Free bonus fan • Free delivery • Free moisture readings
Dehumidifier hire Auckland for homes, construction and flood recovery — fast, simple, and great value. From $75 + GST/day, with free bonus fan, free delivery, and free moisture readings on every rental. Same-day drop-off across North Shore, West, East, and South Auckland. Call 021-877-504 for dehumidifier rental Auckland now.
Popular Drying Packs (Free Delivery)
Simple, effective combinations most customers need. We’ll tweak on-site if required.
Flood Restoration Pack
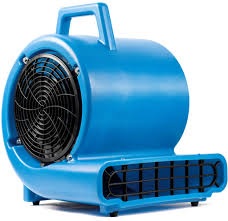
Large 90 L dehumidifier + Free Fan
$75 + GST per day
Construction Drying Pack (Most Popular)
Large 90 L dehumidifier + 2 Fans
- Lock-up chain & padlock
- Multi-plug
- Extension lead
- Moisture test
- $150 + GST / day
- 3-7 day: $400 + GST
Call Now: 021-877-504
- IICRC-certified technicians 24/7
- Free Site Survey & Drying Plan
Not sure what you need? We’ll do a quick phone/video survey (or onsite when required), moisture-map the space, and give you a simple placement plan—free. You’ll know where each dehumidifier and fan goes, target humidity, and expected time to dry.
Don’t let a minor leak become a major mold problem. Save your property with professional LGR technology and IICRC-certified expertise available 24/7.
Rapid dispatch across the Auckland Metro — Same-day delivery guaranteed for bookings before midday.
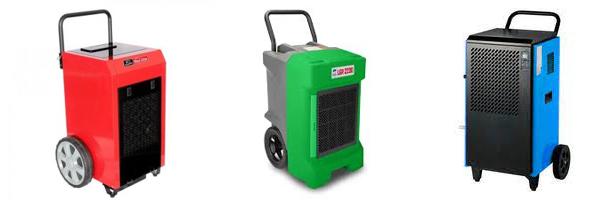
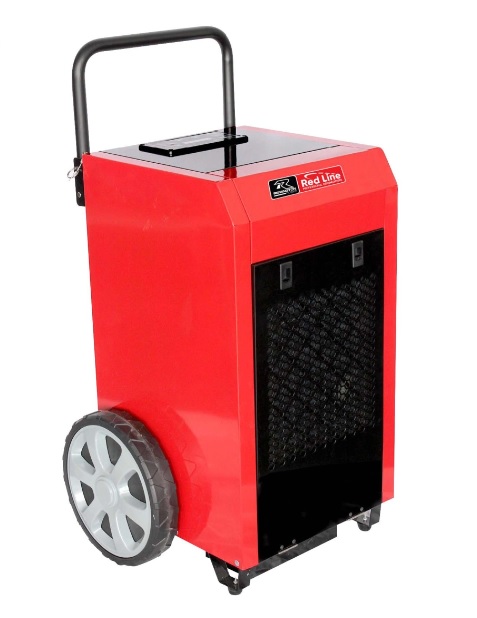
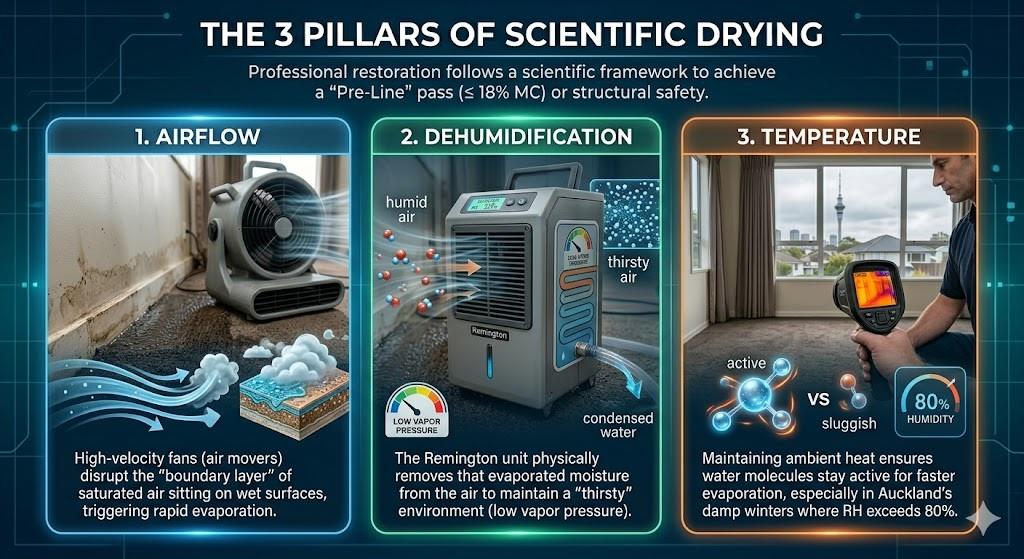
The Industrial Workhorse: Remington RPDH90
We lead with the Remington RPDH90 because it is the industry standard for Auckland flood recovery. Unlike domestic units that only maintain a single room, this machine is engineered for structural drying in high-saturation environments.
Key Features & Capabilities:
-
90L Extraction: Removes up to 90 liters of moisture per 24 hours at $30^{\circ}C$ and $80\%$ $RH$.
-
Built-in 5m Lift Pump: Features an automatic condensate pump that lifts water up to 5 meters. This allows for 24/7 continuous operation into a sink or drain without ever needing to empty a tank.
-
LGR Performance: Low Grain Refrigerant technology pulls moisture even when Relative Humidity ($RH$) drops below $40\%$, essential for deep-drying timber.
-
High-Volume Airflow: Displaces 850 $m^{3}/h$ of air to ensure deep moisture extraction from structural elements.
-
Site-Ready Durability: Robust metal casing and large shockproof PE wheels designed for moving across uneven terrain or saturated carpets.
-
Quiet Operation: Runs at only 66 $dB$, making it suitable for residential use during overnight drying.
Popular Drying Packs (Productized Bundles)
Simplify your recovery with our most-requested equipment combinations.
| Pack Name | Inclusions | Rates (+ GST) |
| Flood Restoration Pack | 1x Remington 90L + 1x FREE Air Mover | From $75/Day (Min 3 days) |
| Construction Drying Pack | 1x Remington 90L + 2x Fans + Moisture Meter | $150/Day or $400/Week |
| Home Health & Mould Pack | 1x 30-50L Quiet Unit + Air Scrubber (Optional) | From $69/Day or $199/Week |
All packs include FREE Auckland metro delivery, setup, and 24/7 technical support.
“Proof of Drying” — Your Insurance Claim Advantage
We provide the “Paperwork of Proof” that NZ adjusters require for claim approval. Our documentation ensures you aren’t left paying for secondary damage.
-
Forensic Photo Log: Digital evidence of the property at arrival, during setup, and at completion.
-
Daily Moisture Mapping: We track the Moisture Content ($MC$) of timber and flooring daily until it hits council-approved targets.
-
Handover Certificate: A formal report verifying the property is dry and safe, preventing future mold-related claim denials.
Auckland Suburb Authority & Moisture Map
Auckland’s unique geography creates distinct drying challenges. We provide specialized service tailored to your local environment.
-
North Shore (Albany & Takapuna): High coastal humidity requires LGR technology to overcome the dew point.
-
West Auckland (Westgate & Henderson): Heavy clay soils increase surface runoff and subfloor dampness.
-
South Auckland (Pukekohe): Volcanic loam soils are highly moisture-retentive, necessitating 24/7 subfloor ventilation.
-
Central Auckland (CBD): We manage high-rise logistics and security protocols for apartment flood recovery.
Technical Specifications Comparison
| Specification | Remington RPDH90 | DRI-EAZ BD 2500 |
| Max Extraction | 90 L/Day | 63 L/Day |
| Airflow | 850 $m^{3}/h$ | 350 $m^{3}/h$ |
| Power Consumption | 1270W – 1300W | 700W |
| Noise Level | 66 $dB$ | 56 $dB$ |
| Best Use Case | Heavy Floods / Timber | Single Room Leaks |
Ready to dry out?
Don’t wait for the insurance assessor to call. In Auckland’s humidity, mold can colonize within 48 hours. Start the mitigation process now.