In the humid Auckland climate, a small leak can quickly turn into a structural nightmare. Most people think if the carpet feels dry, the job is done. However, as both a restorer and a builder, I know that water hides where you least expect it.
Professional moisture mapping uses thermal imaging and moisture meters to detect hidden water behind walls. This process identifies the restoration perimeter, preventing structural rot and mould. Auckland technicians map these damp zones to ensure dehumidifiers are placed effectively for complete drying.
Essential Moisture Detection Tools
| Tool Type | Primary Function | Best For |
| Thermal Camera | Detects temperature variances | Rapidly locating “cool” damp spots |
| Non-Penetrating Meter | Measures conductivity | Checking delicate tiles or wallpapers |
| Penetrating Probe | Physical moisture reading | Testing subfloors and timber framing |
| Hygrometer | Measures air humidity | Monitoring dehumidifier performance |
Source: Restoration Industry Association (RIA)
🔍 The Science of Finding What You Can’t See
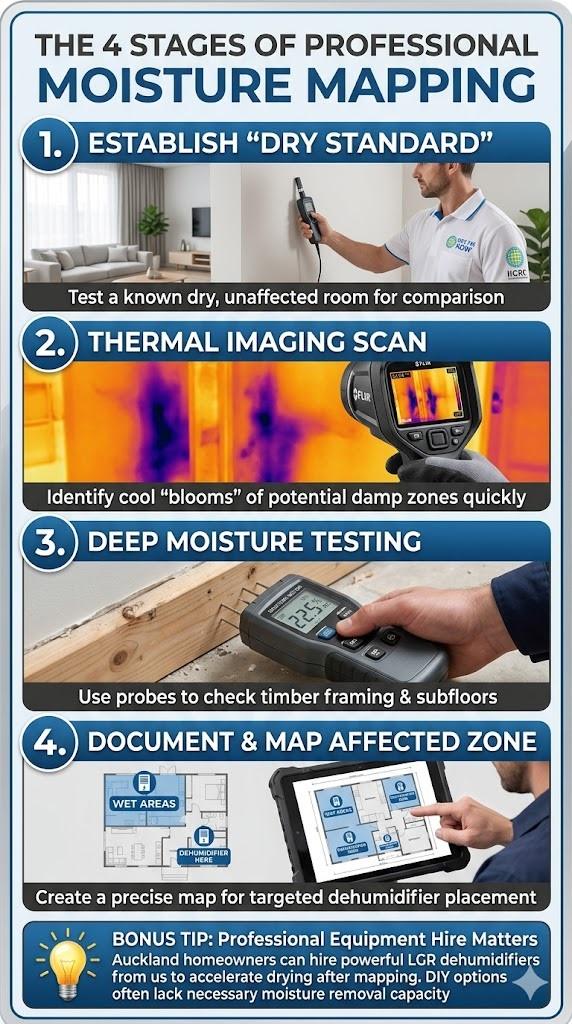
When we walk into an Auckland home after a flood, the first thing we do isn’t pulling out the vacuums. We start with a thermal imaging camera. This tool doesn’t see water; it sees heat. Because evaporating water is cooler than the surrounding structure, damp areas show up as dark blue or purple “blooms” on the screen.
In our experience servicing Auckland homes, we often find that water has travelled three metres away from the original leak through the subfloor. Once we find a suspicious spot, we use moisture meters to confirm the levels. We check the wall linings and the underlying materials to ensure the internal yarns of the carpet aren’t just sitting on a swamp.
While a restorer focuses on removing every drop of water, a structural engineer might argue that certain heavy timbers can safely hold a higher moisture percentage without losing their load-bearing integrity.
🛠️ The Professional Mapping Process -> From Start to Finish
The process follows a strict logical path to ensure nothing is missed:
-
Establish a “Dry Standard” -> We test an unaffected room to see what “dry” actually looks like for your specific house.
-
Perimeter Scanning -> Using thermal tools to trace the edges of the water migration.
-
Deep Testing -> Using probes to check the moisture content of the timber framing behind the plasterboard.
-
Documentation -> Creating a physical map of the “wet” vs “dry” zones.
This data allows us to place our hire equipment, like high-grade dehumidifiers and air movers, exactly where they are needed. It prevents you from paying for electricity to dry a room that is already at equilibrium. We track these numbers daily until the building materials return to their pre-loss state.
In the world of high-end carpet cleaning, we worry about the surface tension of the textiles, yet a builder knows that gravity is the real enemy, pulling moisture into the structural “bottom plate” where it can stay wet for months.
🏚️ Why Surfaces Lie: The Carpentry Perspective
As a Licensed Building Practitioner, I’ve seen many DIY attempts go wrong. A homeowner might run a small domestic dehumidifier and think the wall feels “dry enough.” But modern Auckland homes often use treated timber and insulation that can trap moisture like a sponge. If that water stays trapped, the structural integrity of your home is at risk.
Hidden moisture causes the timber to swell and eventually rot. By the time you see the mould on the skirting boards, the damage inside the wall is already done. Moisture mapping is the only way to prove the structure is safe. We don’t guess; we measure. This ensures your home remains healthy and your insurance claim is backed by hard data.
Microbiologists warn that mould spores are the primary health risk in damp homes, but as a carpenter, I see the physical collapse of the internal wall framing as the most immediate danger to your family’s safety.
Auckland Home Maintenance Advice
-
Check your skirting: If they look swollen or “wavy,” you likely have a hidden leak.
-
Ventilation is key: Always use extraction fans in bathrooms to prevent atmospheric moisture from soaking into the ceiling materials.
-
Act fast: If you have a flood, professional drying should start within 24 -> 48 hours to prevent permanent textile damage.
Frequently Asked Questions
Does moisture mapping damage my walls?
Not necessarily. We use non-invasive meters for the initial scan. We only use small pin-probes in discrete areas if we need to confirm the moisture levels inside the timber framing.
How long does a moisture survey take?
For a standard three-bedroom Auckland home, a thorough mapping session usually takes 60 -> 90 minutes, depending on the extent of the water travel.
Can I just use a heater to dry it out?
No. Heaters alone just move the moisture into the air. Without a professional dehumidifier to “catch” that water, it will simply settle back into other cool surfaces in the house.
Key Takeaways for Homeowners
-
Visible dryness is a myth: Always verify with professional tools.
-
Thermal imaging is the first line of defence: It catches what the human eye misses.
-
Mapping saves money: It targets the drying process, reducing equipment hire time.
-
LBP expertise matters: Understanding how a house is built helps us find where the water is hiding.